IAM Identity Center: Simplifying User Management and Use Temporary Credentials with AWS CLI
IAM Identity Center simplifies user management and enhances security in AWS. Learn about temporary credentials, managing multiple accounts, and using temporary AWS keys. Follow step-by-step guide to enable IAM Identity Center, configure user and permissions, and access AWS accounts through AWS SSO


In today's digital landscape, the need for secure user management and access control is more important than ever. Traditional permanent credentials, such as usernames and passwords, have proven to be vulnerable to various security threats. That's why it is essential to embrace the concept of temporary credentials, which offer numerous advantages in user management and security.
One of the key solutions to address the shortcomings of permanent credentials is the use of temporary credentials. Temporary credentials provide time-limited access to resources, ensuring that access privileges are granted only when needed. By utilizing temporary credentials, organizations can significantly reduce the risk of unauthorized access and potential data breaches.
In this article, we will explore how to access AWS cloud from AWS CLI without using permanent IAM credentials tied to your IAM user. IAM Identity Center, the successor to AWS Single Sign-On, is a service that can manage IAM users, credentials, and much more. This service is free to use and can be easily set up. The process for setting it up will be explained later in this article.
AWS describes IAM Identity Center as follows:
Manage workforce access to multiple AWS accounts and cloud
applications. Use IAM Identity Center to connect an existing directory or use the built-in Identity Center directory to manage user access to AWS accounts and cloud applications.
You can read more about it here.
IAM Identity Center offers several advantages over regular IAM users:
- Manage Multiple Accounts with a Single Identity: IAM Identity Center allows users to manage multiple AWS accounts using a single identity. This eliminates the need to manage separate credentials for each account, improving user convenience and productivity.
- MFA Support with TOTP and Hardware Keys: IAM Identity Center supports multi-factor authentication (MFA) using Time-Based One-Time Passwords (TOTP) and hardware keys like YubiKey or Titan. This adds an extra layer of security to user authentication, preventing unauthorized access to AWS resources.
- Temporary AWS Keys Generation on CLI: IAM Identity Center enables the generation of temporary AWS keys directly on the command-line interface (CLI). This simplifies the process of obtaining temporary access credentials, enhancing the efficiency of developers and system administrators.
- External Identity Provider Integration: IAM Identity Center seamlessly integrates with external identity providers like Okta. This integration allows organizations to leverage their existing identity management systems while benefiting from the advanced user management capabilities of IAM Identity Center.
How to Enable IAM Identity Center
Now let's see how to enable IAM Identity Center and understand how it works. We will go through each step, but first, you will need an AWS account with root access as a prerequisite. Login to that account and we can proceed from there.
Find the IAM Identity Center service in the AWS console. On the right side, you will see the "Enable" button, as shown below.
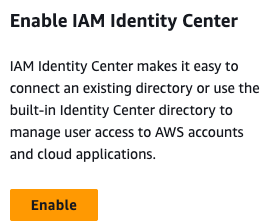
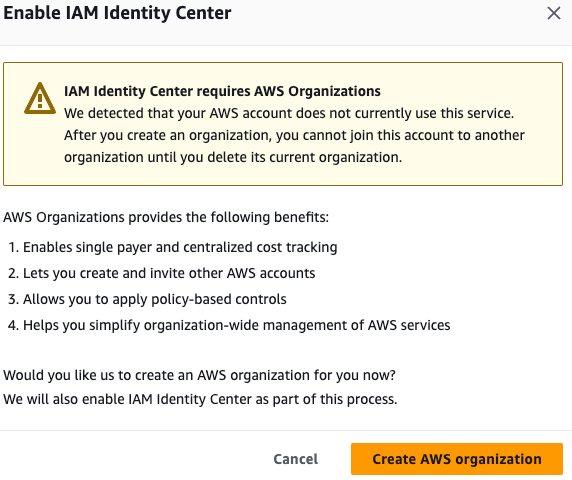
Click the "Enable" button, and it will prompt you to create the organization. This will convert your AWS account into an organization account, which is required to enable IAM Identity Center. Click "Create AWS Organization" on the popup, as shown below.
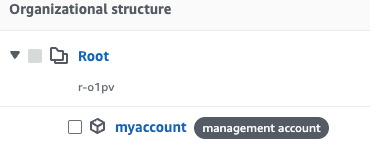
After creating the AWS Organization, you will be taken to the "IAM Identity Center > Dashboard". Now, your account is a management account that can manage users and groups across multiple AWS accounts. You can also manage the same root account with the IAM Identity Center.
By navigating to the "AWS Accounts" tab, you can observe that the root account is designated as the management account, as illustrated below.
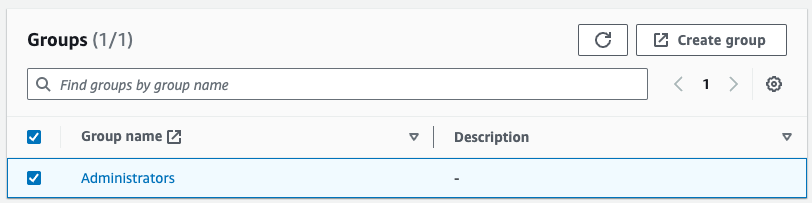
Now it's time to create "User", "Group", and "Permission sets". Let's start by creating our first Group to manage users. In this example, we will name the Group "Administrators". You can create as many groups as you need for your organization.
To create a group, go to the Groups page and click the "Create group" button. Name the group "Administrators" and click "create". This will create the group, and you can assign users to it later.

Now go to “Users” page to create a new user. These are the users you manage across multiple accounts. Even if you have one account it will have advantages which are already mentioned before. To create a new user click “Add user”. Name the user “myuser” for this example. Fill in the details like email and password as desired and lick “Next”. As we have already created the group you can select the “Administrators” group from the list and then Click “Next”. Now review the user details and when you are happy with it click “Add user”.

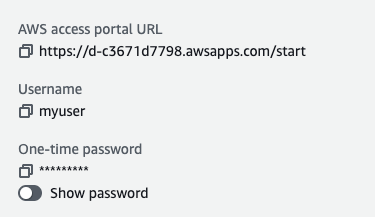
This will create the user and display some information about the created user. The information will look like the following. Please take a moment to save the username, password, "AWS access portal" URL, and "SSO_REGION" as these are important details required for signing in later.
Now that we have created a user and group, we need to connect which user has which permissions to which accounts. To do this, we will create a "Permission set". Follow these steps:
- Go to Permission sets.
- Click "Create permission set".
- Select either "Predefined permission set" or create a "Custom permission set".
- For our purpose, let's select "Predefined permission set" and choose "AdministratorAccess".
- Click "Next".
- Name the Permission set as "AdministratorAccess".
- Set the "Session duration" to 1 hour or choose a duration that suits your needs.
- Add relevant tags.
- Press "Next".
- Review the information and when you are satisfied, press "Create".
The final step is to attach the group and permission sets to the AWS account. Follow these steps:
- Go to "AWS Accounts" and click on "myaccount" (replace "myaccount" with your account alias)
- Navigate to "Users and groups".
- Click on "Assign users or groups".
- Choose whether you want to assign groups or users. For this example, select "Groups" as it is easier to manage.
- Click "Next".
- Select "Permission sets".
- Choose the "AdministratorAccess" permission set that was created earlier.
- Click "Next".
- Now Review and submit assignments to "myaccount" before you click submit.
- Click "Submit" and wait a few seconds for the relevant IAM roles to be provisioned in the account.
To verify that all the steps we completed earlier are functioning correctly, navigate to IAM > Roles. Here, you will find a role named AWSReservedSSO_AdministratorAccess_ba7390b23aa3456f which is provisioned by IAM Identity Center.
Access the AWS console in your browser using AWS SSO
To access the AWS console in your browser, use the "AWS access portal" URL that you received earlier when creating your user. Open your browser and navigate to that link. Authenticate by entering your username and password that you created earlier. If it's your first time logging in, you might be prompted to change your password. As an additional security measure, I also recommend setting up MFA (Multi-Factor Authentication) for your account.
Once you have signed in, you will see a screen similar to the following:
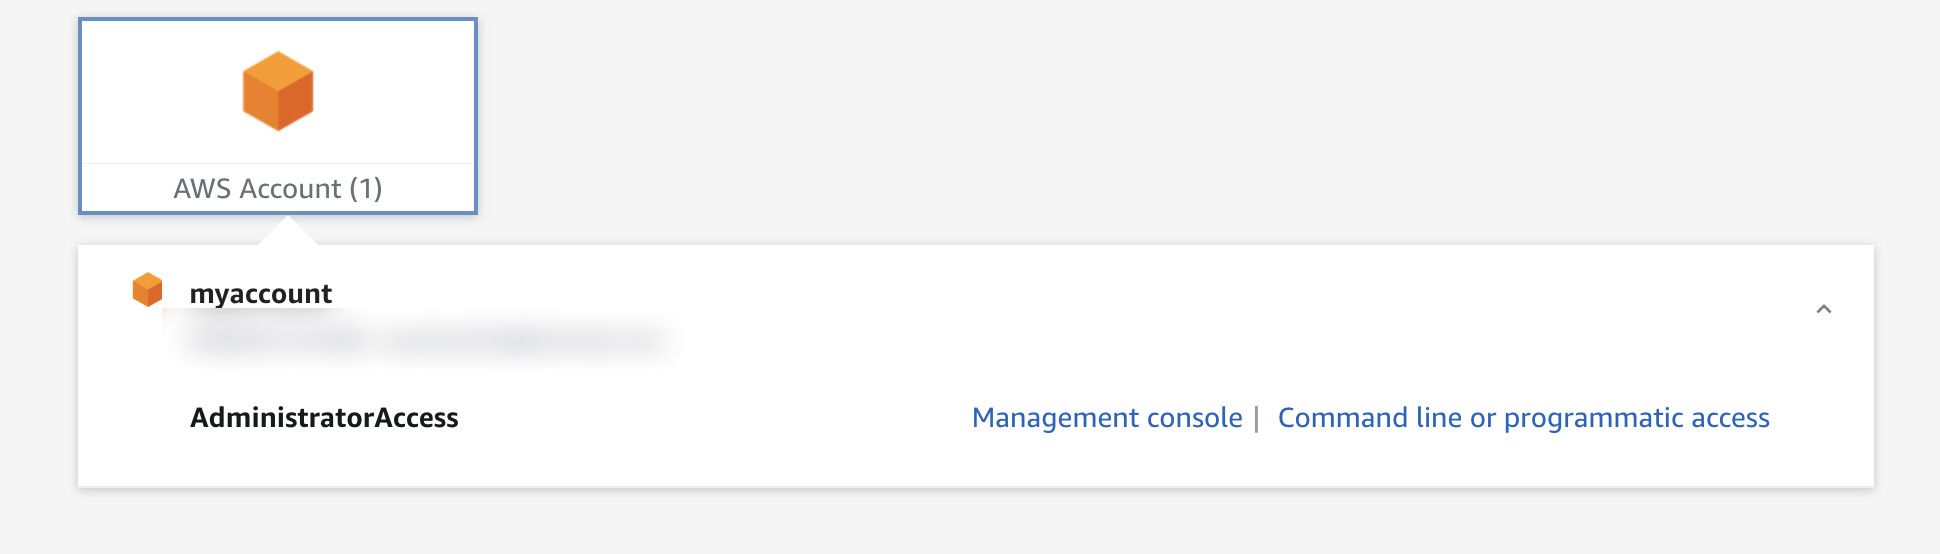
This screen displays all the accounts that you have access to. Select the relevant account and click on "Management console" to access your AWS Console.
Access the AWS service in your terminal using AWS SSO
To access the account in your terminal we will be using a utility called aws-sso-util (https://github.com/benkehoe/aws-sso-util). You can download and install it for your environment.
Configure your profile
After installing, we will configure the profile. Run the following command to configure the profile:
aws-sso-util configure profile myprofile --sso-start-url https://d-c3671d7798.awsapps.com/start --sso-region eu-north-1Replace myprofile, --sso-start-url, and --sso-region with the appropriate values for your account. You will be prompted to fill in some configuration options that will customize your profile. Use the configuration that best suits your needs.
SSO session name (Recommended):
WARNING: Configuring using legacy format (e.g. without an SSO session).
Consider re-running "configure sso" command and providing a session name.
SSO start URL [https://d-c3671d7798.awsapps.com/start]:
SSO region [eu-north-1]:
The only AWS account available to you is: <account-id>
Using the account ID <account-id>
The only role available to you is: AdministratorAccess
Using the role name "AdministratorAccess"
CLI default client Region [None]:
CLI default output format [None]:
This will configure the profile that can be used with awscli. Now we will use aws-sso-util login to login and get the temporary credentials. To do that run the following command and replace URL and region with yours
aws-sso-util login https://d-c3671d7798.awsapps.com/start eu-north-1A browser will open for you to log in. Verify the code displayed in your terminal that matches the one in your browser, and then press "verify and continue". Enter your username and password to authenticate, and press "allow". Once authenticated, you can close the browser.
After closing the browser, your ~/.aws/credentials file will be populated with temporary credentials. These credentials have been created and will expire after 1 hour, as specified in your assigned permission set. To verify this, execute the following command.
# You can also AWS_PROFILE environment variable for the profile
aws sts get-caller-identity --profile myprofile
If everything is working successfully, you should be able to see your account ID and the role. You will have access to what is based on the role you chose in the permission sets.
Summary
In this post, we explored how the IAM Identity Center can serve as a solution for secure user management and access control in the AWS environment. We emphasized the use of temporary credentials as a means to address the vulnerabilities associated with permanent credentials. The advantages of the IAM Identity Center were discussed, including the ability to manage multiple accounts with a single identity, support for MFA, and simplified generation of temporary AWS keys. Additionally, we provided step-by-step instructions on how to enable the IAM Identity Center, configure user groups and permissions, and gain access to AWS accounts. Lastly, we covered the process of accessing the AWS console and AWS services through AWS SSO, both in the browser and the terminal.